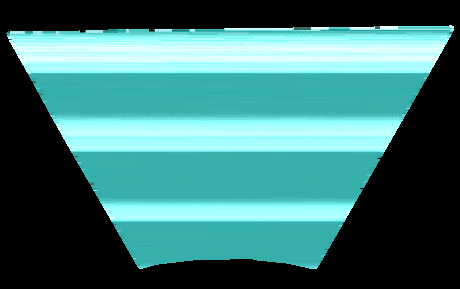
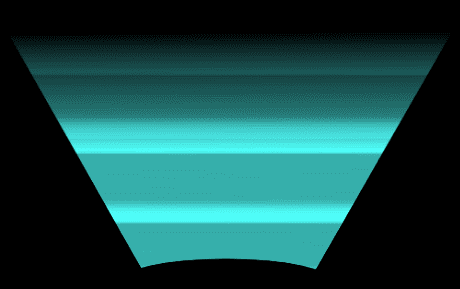
Hacking through shaders
August 27, 2018
Any sane programmer would teach “Read the documentation, understand what you are doing, and you’ll be able to solve your problems”. While true, there is a flaw : the time required to fully understand something grows bigger and bigger as what you are learning is vast or deep. Sometimes, hacking its way in might be enough, and how fun would life be without a bit of crazyness? let’s hack into shaders !
Just a step back
Ok yes there ARE things you must know before diving into shaders, here they are :
-
A shader contains 3 key parts : declarations, vertex function, and fragment function.
- Declarations allow you to drive or configure the shader from scripting.
- Vertex function allows you to affect the 3D world (displacement of vertex)
- Fragment function allows you to affect the rendered pixels on screen.
- A color is represented as a 4 dimensions vector
fixed4. - In the fragment function, you manipulate only one pixel at a time.
frac(float)function return the decimal part of a float.text2D(sampler2D,float2)gives the pixel color of the texturesample2Dat the coordinatefloat2. You get this coordinate as input in the fragment function.- Coordinates are between (0,0) and (1,1).
It may looks very specific if you a new to shaders but this is actually things you’d find early while learning shaders.
Multiple layers of rendering
I’m working on a game called A Time Paradox which takes place in a futuristic universe (in a spaceship riding a blackhole horizon). A way to evocate a futuristic world is using something both typical, visual appealing, and quick to create : holograms.
So here is the idea : we will display a spotlight texture as a background, then animate a glitch texture on the top of it, to simulate scanlines. The plan? Find a simple enough sprite shader as starter, add a glitch texture as parameter on top of the main texture, do fun math to animate the glitch texture
Find a starter shader
Note : I use Unity and paint.NET as tools but the workflow would work for any engine or technology supporting shaders and any image editor.
On https://unity3d.com/fr/get-unity/download/archive you’ll find under “downloads (your platform)” an entry named “integrated shaders”. It contains all built-in shaders of unity and can be copy/pasted/modified in your project. I choose to start with the shader DefaultResourcesExtra\Unlit\Unlit-Alpha.shader since i’m working in 2D without lighting, and I want transparency in my result. It looks like :
// Unity built-in shader source. Copyright (c) 2016 Unity Technologies. MIT license (see license.txt)

// Unlit alpha-blended shader.
// - no lighting
// - no lightmap support
// - no per-material color

Shader "Unlit/Transparent" {
Properties {    _MainTex ("Base (RGB) Trans (A)", 2D) = "white" {}}
SubShader {
    Tags {"Queue"="Transparent" "IgnoreProjector"="True" "RenderType"="Transparent"}
    LOD 100

    ZWrite Off
    Blend SrcAlpha OneMinusSrcAlpha

    Pass {
        CGPROGRAM
            #pragma vertex vert
            #pragma fragment frag
            #pragma target 2.0
            #pragma multi_compile_fog

            #include "UnityCG.cginc"

            struct appdata_t {
                float4 vertex : POSITION;
                float2 texcoord : TEXCOORD0;
                UNITY_VERTEX_INPUT_INSTANCE_ID
            };

            struct v2f {
                float4 vertex : SV_POSITION;
                float2 texcoord : TEXCOORD0;
                UNITY_FOG_COORDS(1)
                UNITY_VERTEX_OUTPUT_STEREO
            };

            sampler2D _MainTex;
            float4 _MainTex_ST;

            v2f vert (appdata_t v)
            {
                v2f o;
                UNITY_SETUP_INSTANCE_ID(v);
                UNITY_INITIALIZE_VERTEX_OUTPUT_STEREO(o);
                o.vertex = UnityObjectToClipPos(v.vertex);
                o.texcoord = TRANSFORM_TEX(v.texcoord, _MainTex);
                UNITY_TRANSFER_FOG(o,o.vertex);
                return o;
            }

            fixed4 frag (v2f i) : SV_Target            {                fixed4 col = tex2D(_MainTex, i.texcoord);                UNITY_APPLY_FOG(i.fogCoord, col);                return col;            }        ENDCG
    }
}}
Here we find “Properties”, and both “vert” and “frag” functions. The frag function is basically doing the following thing : lookup the pixel color in _MainTex that is located at i.texcoord position, run a UNITY_APPLY_FOG process we don’t know about, return the color.
Let’s try this shader already :
- copy/paste file in project asset folder;
- in shader file line 8, rename shader from
Shader Unlit/TransparenttoShader Custom/MyHologram; - in unity editor right click on shader file -> create -> material to create a new material linked with the shader;
- drag and drop the “spotlight” sprite into the scene;
- drag and drop the material from asset folder to the sprite in the scene hierarchy, so that the sprite uses the material configured with our shader.
The “spotlight” sprite? Let’s use this one :
You should end with something like this :
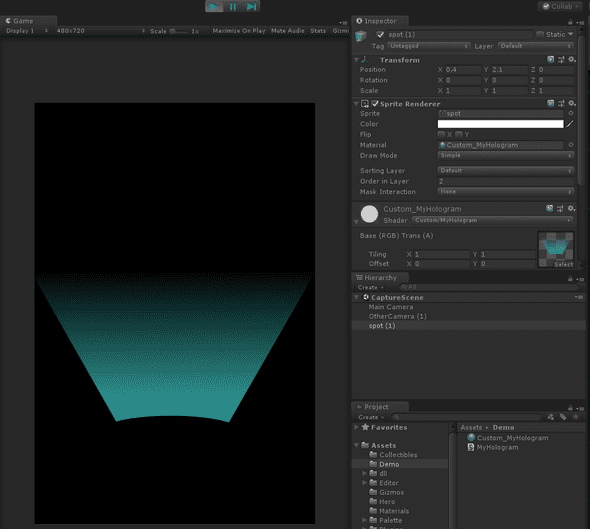
Add a glitch texture
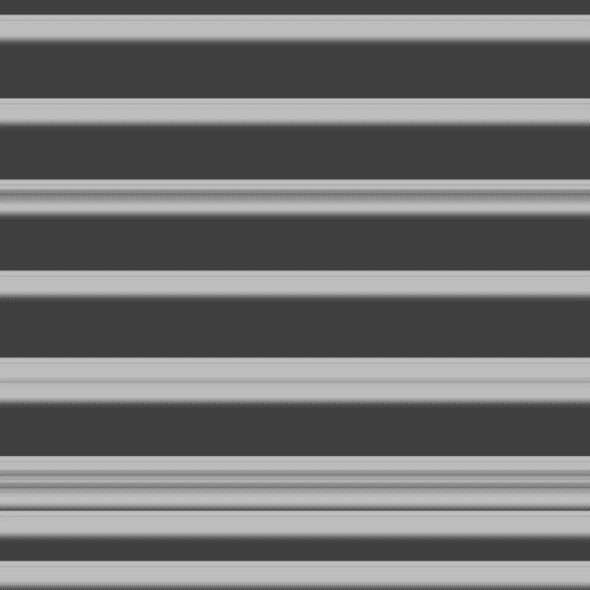
Let’s add a new glitch texture. We could either find one online, or create it ourself. Here is how I created mine :
- Create a 1024x1024 png file filled with black.
- On a new layer, draw random horizontal white lines of 3 pixels height.
- Duplicate last created layer, apply a “motion blur effect” toward top, 10px
- repeat step 3. a few time until it creates a smooth gradient
- remove the original line layer (the pure white is too hard and sharp)
- merge all remaining layers
You should get something like that (well, I also tweaked the luminosity curve a bit) :
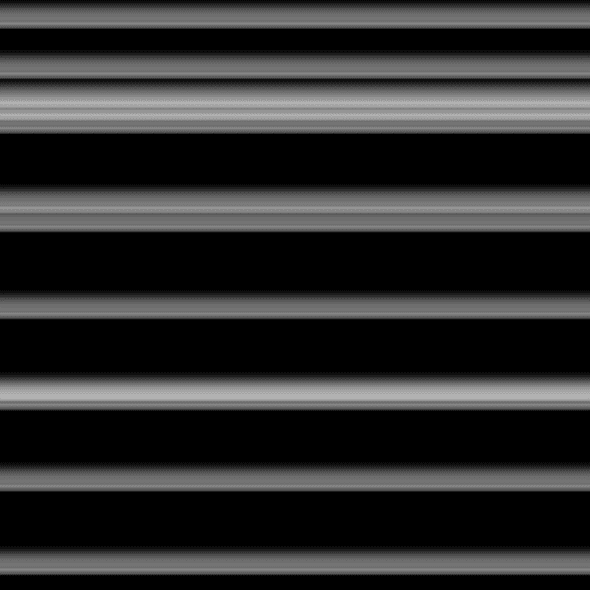
To use it into our shader, let’s mimic what is done for the _MainText.
Line 11, add in the _GlitchTex property:
Properties {
    _MainTex ("Base (RGB) Trans (A)", 2D) = "white" {}
    _GlitchTex ("Glitch Texture", 2D) = "white" {}
}
Then line 44, add the _GlitchTex declaration :
sampler2D _MainTex;
sampler2D _GlitchTex;
float4 _MainTex_ST;
From here, the “Glitch texture” property should appear in the spotlight inspector in Unity. Select the texture you just created (or use mine) as value.
And… nothing happens. We now need to actually use the texture we declared in the shader code, the fun maths beggins !
Fun with maths
To change the rendering of the pixels, the fragment function is the one we should work with :
fixed4 frag (v2f i) : SV_Target
{
    fixed4 col = tex2D(_MainTex, i.texcoord);
    UNITY_APPLY_FOG(i.fogCoord, col);
    return col;
}
We want to get the color of our glitch texture, let’s try to copy the function for the _MainTex, and mix the 2 colors.
    fixed4 mainCol = tex2D(_MainTex, i.texcoord);
    fixed4 glitchCol = tex2D(_GlitchTex, i.texcoord);
    fixed4 col = mainCol + glitchCol;
Great we mixed the 2 textures into 1 render ! But it looks weird, doesn’t it? The alpha of the first image is overriden by the second texture : we lose the smooth gradient we had and the edges looks wrong. Let’s try using multiply instead of addition to mix the colors.
    fixed4 mainCol = tex2D(_MainTex, i.texcoord);
    fixed4 glitchCol = tex2D(_GlitchTex, i.texcoord);
    fixed4 col = mainCol * glitchCol;
Not bad, but we barly recognize the original sprite. That said, this colors could look good as an “additional layer”. Let’s add the original color on top of this one.
    fixed4 mainCol = tex2D(_MainTex, i.texcoord);
    fixed4 glitchCol = tex2D(_GlitchTex, i.texcoord);
    fixed4 col = mainCol * glitchCol + mainCol;
Hey ! We are getting there !
Now it’s time to animate the glitch. For this, we need some kind of “time” external variable to calculate from. Every engine provide a way to access some time clock, in Unity we can use _Time.y. The idea is to modify the texcoord (reminder: it’s a vector2 between 0,0 and 1,1 for x,y coordinates), to have the y value changed over time and looped between 0 and 1.
To loop a variable that depends on time between 0 and 1 we can do as follow :
fixed scrollValue = frac(0.04 * _Time.y);_Time.y is a value that consistently increase (elapsed time since start of the game ), frac() is keeping only the decimal part of a float (making the value loop between 0 and 1), 0.04 is an arbitrary constant used as a ratio to slow down the scrolling effect. This constant can be exported in a shader property to configure the speed, but let’s keep it inlined for the moment.
In order to remap the texcoord from static to scrolled coordinates, we need to create a new float2 element, and change the y value only so that the glitch scrolls vertically.
    float2 offsetTexCoord = float2(
        i.texcoord.x,
        frac(i.texcoord.y + 0.04 * _Time.y)
    );
    fixed4 glitchCol = tex2D(_GlitchTex, offsetTexCoord);
Here we keep the x value as is, and we add the current y value with the scrollValue that varies over time. This tells the shader to look at a different vertical position inside the texture over time for a given pixel, and because this vertical position moves slowly it renders the texture “offset” or “shifted”. Here we go :
Note that I had to cheat a little to get a perfect looping animation, your hologram should move more slowly that that.
We need to go deeper
It already looks fine, but out pattern recognition machine (aka. our brain) will quickly find out the repetition and loose interest for the visual quickly. No matter, we got more tricks! Let’s use multiple glitch overlay that run at different speed. Basically we copy/paste the shader code above to extract colors at different positions with different timing. It could write like :
fixed4 mainCol = tex2D(_MainTex, i.texcoord);

// glitch 1
float2 offsetTexCoord = float2(
    i.texcoord.x,
    frac(i.texcoord.y + _Time.y * 0.33)
);
fixed4 glitchCol = tex2D(_GlitchTex, offsetTexCoord);
// glitch 2
float2 offsetTexCoord2 = float2(
    i.texcoord.x,
    frac(i.texcoord.y +  _Time.y * 0.4521)
);
fixed4 glitchCol2 = tex2D(_GlitchTex, offsetTexCoord2);
// glitch 3
float2 offsetTexCoord3 = float2(
    i.texcoord.x,
    frac(i.texcoord.y + _Time.y * 0.2541)
);
fixed4 glitchCol3 = tex2D(_GlitchTex, offsetTexCoord3);

fixed4 col = mainCol + mainCol * glitchCol * 0.4 + mainCol * glitchCol2 * 0.2 + mainCol * glitchCol3 * 0.4;
And looks like :
Here it looks up 3 different positions from the same glitch texture, then add them like before but multiplied with a constant to soften the effect (else it becomes too bright). As a consequence, my animation capture cannot loop smoothly because it happens very rarely that the 3 glitch layers get back at their original position synchronously. Also, if it makes that the animation in-game looks like it never repeat itself, which is more satisfying to watch.
We need to go deeper AGAIN
This could be over, yet my brain is not fully satisfied. There are still some patterns I recognize sometimes so it can be even better.
In short : we are adding colors together, which means at any given time for one layer there is always a “minimum” light value (recognized as a white band) which the eye can follow along the way and that will repeat. The fact that there are other lines over it makes it harder to track but not impossible. There is a solution : multiplying the colors together instead of adding them. The consequence is that sometimes the lines overlap (creating brighter lines) and sometimes they get further from each other (fading the lines away).
The math becomes :
fixed4 col = mainCol + mainCol * glitchCol * glitchCol2 * glitchCol3;Also the texture must be tweaked so that there is more overlapping (the current texture has too much black and overlapping must happens more frequently so that the effect works). From the previous texture, I inverted the color, they played with the luminosity curve until the effect looks right. Here goes the texture and the result :
As you can see, sometimes lines appear then fade away, if you have done it yourself you can look at it during hours without recognizing any pattern. The effect is now more subtle, intriguing.
Final words
Thank you for reading! I’m working hard on A Time Paradox so that it looks cool, check it out!
Want to respond to this article? Made something out of it? Let me know!
PM or mention @Lythom or drop a message at samuel@a-game-studio.com. I’ll re-tweet your work.
Happy hacking!

